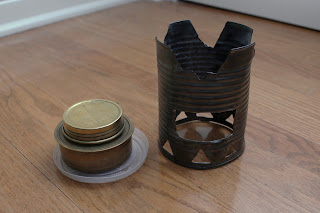
Trangia Lighting Procedure
A brief follow-up: using my homemade soup-can pot stand, the lighting instructions:
 |
| 1. The stove and stand are set out. In cold weather, the stove is set on a plastic soft drink lid to insulate against the ground. |
 |
| 2. The lid is remove, and the burner is lit. The pot stand is then carefully placed over the burner. |
 |
| 4. Now, the stove is ready to cook food! |


I understand the ideal distance from the top of the burner to the bottom of the pot is 1". Your homebrew support/windscreen seems to be a bit high ;) A metal lid, instead of plastic, would allow you to spill a bit of fuel in the lid to start the stove -- in cold it helps to have the stove warmed up a bit. You could use a bit of ensolite sleep pad under the metal lid for insulation from the cold ground....
ReplyDelete